
 I don't make pelmeni often because they (1) are bursting with calories and (2) do require a couple of hours to make. However, they are definitely worth an effort and oh so yummy! :) Also, it's a great way to put kids to work, lol. Our little nieces are well-mannered, compared to other kids their age, and eagerly participate in any hands-on projects, w/out making too much mess in the process. They came to visit this afternoon and proudly made late lunch. And there are no leftovers so I don't have to worry about those lingering calories calling my name... ;)
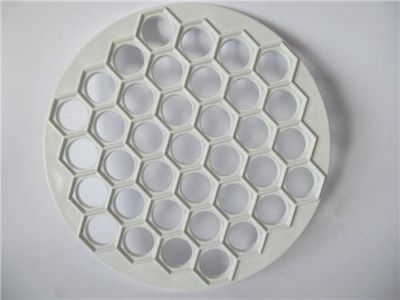
To save time, you can use pelmeni mold. I have an old-fashioned heavy aluminum (alloy?) mold, which is pricey, especially shipping costs, but you can buy a significantly cheaper, plastic version here. This site also contains step-by-step directions. They provide a slightly different recipe but I have not tested it. My recipe, listed below, has been in the family for many years and it always works for me. Mom never measures ingredients, just adds a little bit of this and a little bit of that until she gets the perfect consistency. I had to observe her quite a few times and then practice on my own until I derived this recipe.
Another way to make pelmeni is traditional way -- family-style, with everyone around the counter, filling and shaping. That's what we did today -- to have more fun! :) See directions below.
Ingredients for the Dough:
3 cups all-purpose
flour
1 egg
1 tsp salt
1 cup water
Mix and knead until you achieve the
consistency of soft playdough. Mom pours the flour on the mixing surface, in a little mound, then makes a small hole at the top. Like a crater? ;) Then she pours in the egg, salt, and a little water. She kneads, adding more water, until the dough is ready. Sorry, too much trouble for me...
I just place all ingredients in my breadmaker and set on Dough. You don't have to wait for the entire cycle. When the dough achieves soft playdough consistency, place it in a bowl, cover, and refrigerate for at least an hour or overnight.
Ingredients for the Filling:
1 lb ground beef or turkey (raw, not cooked)
salt, 1/2 tbsp
pepper, 1/2 tbsp
small onion, grated or very finely chopped
Just mix meat, salt, pepper, and onion. You can also add sauteed mushrooms (nothing traditional about that but I like it).
Once the dough is ready, divide it into four portions. Roll out each portion, on a lightly floured surface, as thinly as you can. The dough should be almost translucent. It's fairly easy to roll out, though. Just be patient. Use a round cookie cutter (I improvise with the cap to non-stick spray, lol) to cut the dough into circles. Form filling into small meatballs, approximately 1 full tsp, and place in the middle of each circle. Fold the circle in half and firmly pinch edges. Then bring two corners together and pinch, to form a round dumpling. Here is a photo from today:
Fill the large pot with water, add some salt (like you would for pasta), and bring to boil. Carefully drop pelmeni into the boiling water, bring back to boil, reduce heat to medium, and cook approximately 10 minutes or until done. Remove with the slotted spoon and add a bit of melted butter, to prevent sticking.
Traditionally, pelmeni are served with lots of melted butter and/or sprinkled with white vinegar and freshly ground black pepper (I personally don't care about vinegar and pepper). You can also add some freshly grated Parmesan (my favorite and how we served today) or Afredo sauce. Sour cream is another great idea. I don't recommend tomato sauce because it overpowers the aroma and taste of pelmeni, in my opinion. Enjoy!
No comments:
Post a Comment